About ADOBE Illustrator........
Most
illustration or drawing programs are object-oriented, meaning that objects are
created through vector mathematics rather than raster information. Illustrator uses the Postscipt
language, which creates sharper images on screen and print output. The basic features that you can expect
from most drawing programs are tools which enable you to create and edit basic
shapes such as rectangles, squares, ellipses, circles, polygons, curves
(Bezier), and text. Editing
typically
involves selecting, moving, duplicating, and transformations such as scaling,
rotating, skewing, and reflecting objects. Objects can have attributes such as stroke (line weight) and
fill, which can be patterned or colored, with gradients. Other features you can expect are
layers, wire-frame and preview modes, object alignment, image tiling, blends,
auto-tracing, text manipulation, and various calculation filters for special
effects.
Why
use Illustrator rather than other drawing programs?
•
Dual platform (Mac/PC), industry standard
•
Superior bezier tool interface
•
Wide assortment of tools for creating various shapes and
type
•
Compliments Photoshop very well (both are Adobe products)
•
Superior memory management and performance with large and complex
images
•
Converts text to bezier objects
•
Brush/calligraphy features
•
Masking features
•
Lots of calculation filters
•
Creates custom gradients in any direction
•
Exports illustration as an image map for the Web
Illustrator
works in Postscript and defaults to CMYK, so you will need to convert your
document to RGB if you do on-screen work.
You can open Illustrator files in Photoshop by using the Open
command. Beware- once an
illustration has been converted to a Photoshop (PSD) file, you cannot go
back! Therefore- be careful not to overwrite
your original file, and always keep a backup copy of any illustration in
Illustrator format!
Tools and menus you will be most likely be
using for the Digital Methods class:
•
Selection tool
•
Pen tool
•
Text tool
•
Layers window
•
Color window
•
Attributes window (stroke weight)
•
Object menu (lock)
•
View menu (zoom, outline and preview modes)
Illustrator 9...
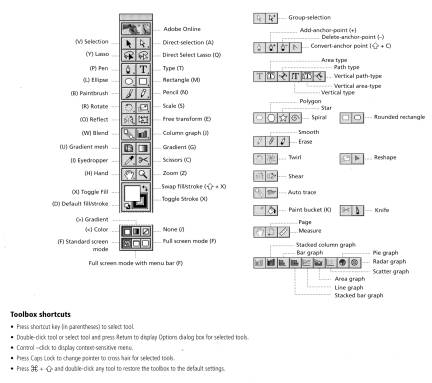
The
Toolbox:
The
tools allow you to create, edit and manipulate objects. There are a number of hidden tools,
identified by a little arrow to the right of the icons. These are accessible by clicking onthe
tool icon and dragging to the right and highlighting your choice. The toolbox can be hidden or displayed
under the Windows menu. Some tools
have hidden options that are displayed by double-clicking on the icon. Transformation tools have options which
are displayed by holding down the Option key while clicking on the object to be
transformed.
Setting
up a file for general use:
•Document SetUp & Page SetUp (File>) sets up the orientation, units, and size of drawing area.
•Document Color Mode (File>) choose RGB or CMYK depending on final output of file. RGB for on-screen and CMYK for printing.
•Preferences (Edit>Preferences>) is
where you can set up tool behavior, edit behavior, keyboard increments, ruler
& type units, grid parameters.
•Edit
menu- allows for copy, paste, selection functions.
•Object menu- allows transformations;
Arranging- shuffling objects front to back, precise movement of objects;
Transform: Move, scale, rotate, reflect; Grouping/ungrouping of objects;
Locking and hiding objects ; Blend options; Path- join and average anchor
points; Masking.
•Type
menu- all kinds of text manipulations, creating text outlines,
etc.
•View menu will allow you to work in either
wireframe (Outline) or a print preview (Preview). Keep in mind that working in Preview slows down performance
when drawings become very complex.
•Rulers (View>Show rulers) allows you to
set up guides. Ruler units are
determined under Preferences. Drag
out vertical and horizontal guides by clicking and dragging from center of each
ruler. Guides can be moved or
deleted by unlocking Guides (Objects>Guides>Lock).
•Color attributes (Window>Show Color) set
color for objects.
•Stroke (Window> Stroke), select dashed
line types (show stroke options) and set line weights.
•Layers (Window>ShowLayers) and other
palettes can be found under the Windows menu. Layers allow you to organize and control objects in separate
layers, to be visible, or active.
You can move any selected object to any layer by pushing the square icon
to a desired layer. You can print
any layer or combination of layers.
•Filters (Filters menu) contain controls
that allow you to modify existing objects. Especially useful filters are
Stylize>Arrowheads, Calligraphy, Drop shadows.
•Align objects under Show Align
(Window
Menu). This is different from
Average
(Object>Path>Average) where the horizontal or vertical average between
control points are calculated.
Working tips for Digital Methods class: Labeling
• Note the image dimensions of the CT
image file you want to label
•
Open your CT image in Illustrator
•
Convert to RGB: File>Document
Color Mode>RGB
•
Work in layers: Create your
text and lines in a new layer, and lock your CT image in the background
layer. View or print only
the layers you want. Move objects
between layers by selecting the object, then moving the little square symbol on
the far right in the Layers Palette.
Hold the option/alt key down while moving to copy objects to another
layer.
•
Know which layer you are working in: Be sure you are in the correct layer when creating new text
or lines.
•
Label your layers: To avoid
confusion, it is best to name each layer appropriately, for example, bones for
one layer, processes for another.
• Set up your document with
proper units: File>Document
setup. Select pixels as your
units.
•
Work at high magnification:
Zoom in to see your CT image and place lines and labels, but always
check the quality of your work at 100% because the final file will be viewed at
100%.
•
Create straight lines and angled lines: Hold option key while using the pen tool to constrain lines
to straight or 90 degrees.
•
Select object first before making changes to it: Objects must be selected before any changes will be
applied to it.
•
Check for any extraneous points in your text layers: Hide other layers and select all.
•
Save-As: Save your file
with an .ai extension. Be sure to
include slice number in your file name.
•
Open file in Photoshop:
When opening your .ai file in Photoshop, be sure to select
anti-aliasing, 72dpi, RGB, and input the original dimensions of your CT
image.